|
55.4 Export to QuickBooks / Reckon |
  
|
|
55.4 Export to QuickBooks / Reckon |
|
55.4.1 Before you try to export for the first time, make sure you have read and setup the requirements in the following section of this How to Guide:
'Enter your bank accounts on the Bank Accounts screen'
'Prepare Latitude to exchange data with Accounting Software'
QuickBooks and Reckon
Latitude has a separate accounting links group of the two however, currently all instructions and troubleshooting errors that Latitude documented still applies to both of them. Note, be aware that this may change in the future.
55.4.2 Latitude supports two different ways to export and import transactions:
Intuit Interchange Format (IIF)
QuickBooks Extensible Markup Language (qbXML)
Intuit Interchange Format (IIF)
This option exports a text file that is then imported into QuickBooks. This text file can be generated from any copy of Latitude and imported into any copy of QuickBooks. This is useful if QuickBooks is installed on a different computer or network. Transactions that can only be exported using IIF depends on the QuickBooks version. These accounting links are suffixed with "(IIF)".
QuickBooks Extensible Markup Language (qbXML)
This option reads and writes data directly into the QuickBooks database therefire Latitude and QuickBooks must be installed on the same computer in order for it to function.
To export Invoices & Receipts:
Latitude and QuickBooks company file must be open.
Login to QuickBooks, the User must have Administrator rights
During the export to QuickBooks, you will be prompted to give the Latitude Accounting Link permission to access your QuickBooks data. The prompt will look like this: "QuickBooks - Application with No Certificate"
For Invoice exports, the Application Names that need to be given permissions are:
Latitude Accounting Link - Invoices
Latitude Accounting Link - Load Customers
For Receipt exports, the Application Names that need to be given permissions are:
Latitude Accounting Link - Receipts
Latitude Accounting Link - Load Invoices
For help on giving permissions to integrated applications, read QuickBooks Help topic "Allowing an integrated application to access QuickBooks". You can also give permissions to Latitude applications by: Menu bar -> Edit -> Preferences -> Integrated Applications -> Company Preferences tab
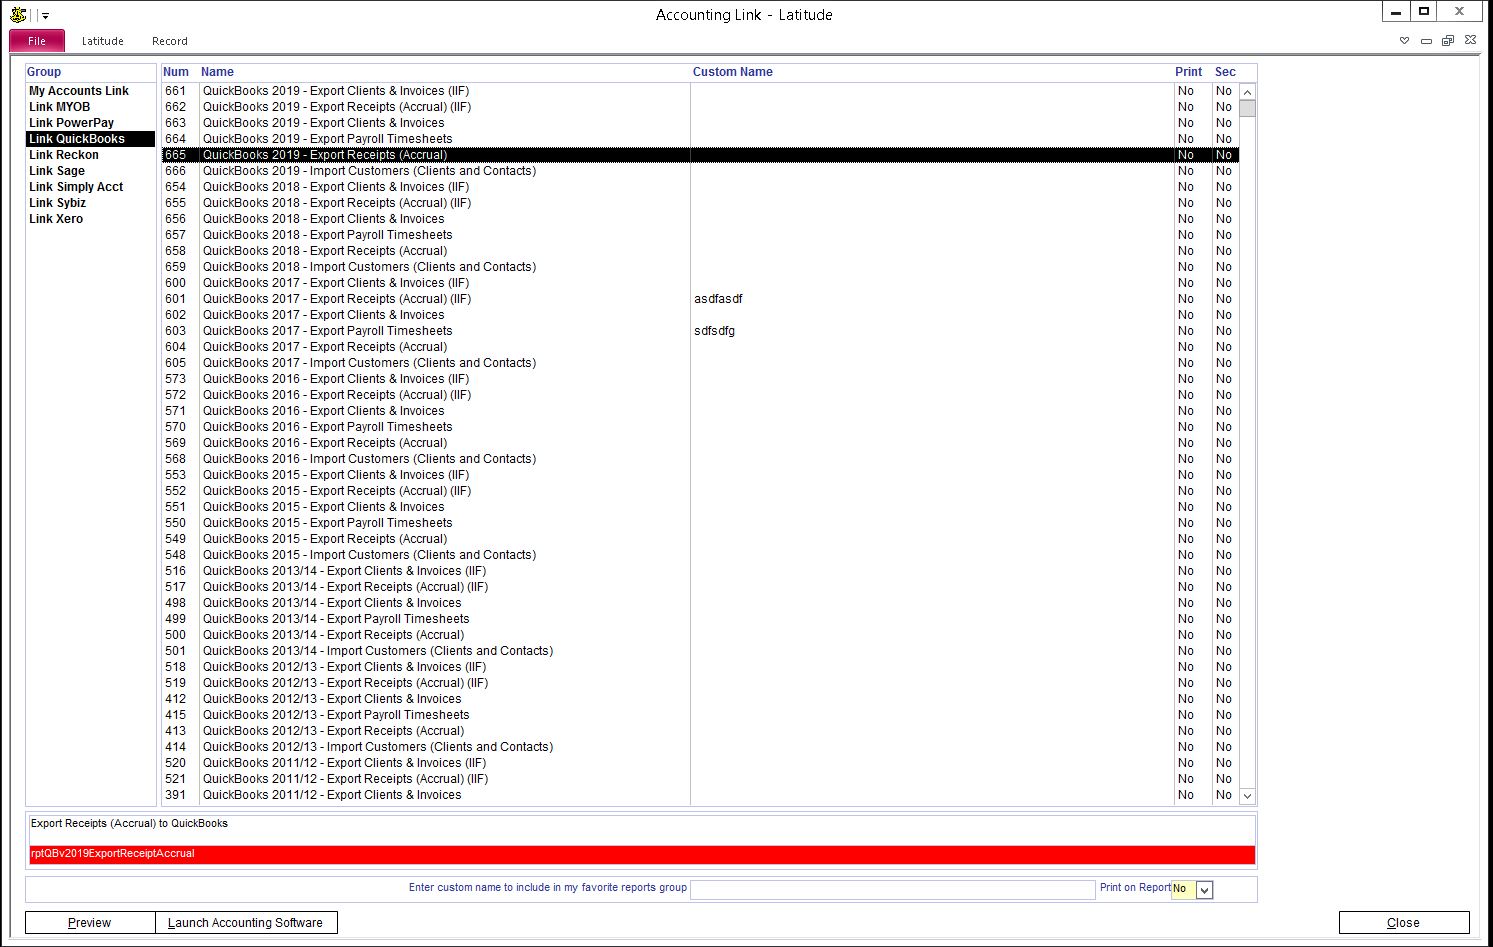
55.4.3 See Ribbon -> "Finance" column, and click on the "Accounting Link" button to open the "Accounting Link" screen.
In the "Group" column, select "Link QuickBooks".
In the "Name" column, select "QuickBooks <version> - Export Clients and Invoices"
Press the "Preview" button
In the "Report Dialog Box",
Enter the invoice date range and Invoice Reference Number.
To export all invoices during the date range, enter * in the Invoice Reference Number.
Pick the invoice status you only want to export, by default "Submitted" is picked.
Tick the "Include Job Number" option to link those invoices raised against a Job to "Client:Job", rather than directly to the Client only.
Tick the "Consolidate *" options to combine invoice line items based on either GL Account, Tax Type and Class.
Click "Preview" button to run the report and preview the invoices to be exported.
Click the "Close" button on the Ribbon
Click "Yes" to export them to QuickBooks
You may receive an error message if you have not setup "Accounting Link" properly or "Client Code" is longer than what is allowed by QuickBooks.
For QuickBooks (IIF):
If the export was successful, you will find an IIF file in the directory where you specified in "Export Path" in Setup Latitude, called "LatiQBex.iif".
Run a QuickBooks import routine to import this IIF file. Refer to your QuickBooks User Guide on how to import IIF files into QuickBooks.
NOTE:
QuickBooks returns an error if you attempt to import an Invoice with a Job Number which is the same as it's Client Code. To avoid this, ensure your Job Numbers are different to your Client Codes.
NOTE:
The QuickBooks online edition does not currently handle either of the above QuickBooks import/export facility. You need to use a third party product available in QuickBooks Marketplace.
55.4.4 Client and Invoice Addresses
For non-Companies, that is those where the "Company" check box is not selected on the Latitude Business Contacts screen, the address begins with the name of Main Contact, followed by the street address.
For Companies, address begins either with the Company name or the name of Main Contact, depending on the Latitude Setup option. The street address then follows. Do not use characters such as ampersands and quote marks in Company Names as the QB import cannot handle them. Check your QB documentation for more unacceptable characters.
To check or change the address order, open the Latitude Setup screen, go to the "Option 2" tab and use Group 5 "Address shows Company Name first" option.
Make sure the "Accounts Receivable Acct", "Default Income Acct", "Service Item", "Invoice Class" (if class is used) and "Invoice Line-Item Class" (if class is used) you entered into Setup Latitude are correct. Also confirm that the "Chart of Accounts Account Number" entered in the Latitude Bank Accounts screen is correct, and that the Terms you use Latitude exist in QB e.g. if you use Terms "30" in Latitude and "30 days" in QB, they will not match in he import, so you will have to add Terms "30" to QB.

)