|
9.2 General Tab |
  
|
|
9.2 General Tab |
|
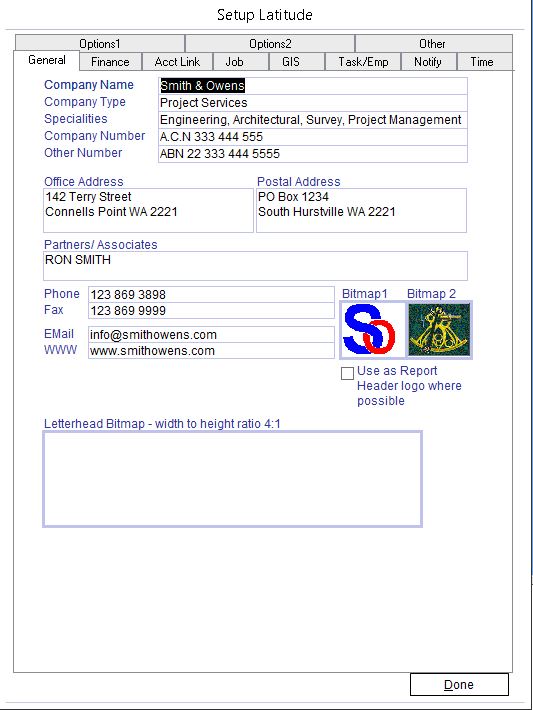
9.2.1 Enter your Company Name as you want to see it in reports and invoices. The case (upper and lower) of the name you enter here will be used in all invoices and reports in Latitude.

9.2.2 Enter your company type and specialties.
These will be used in some invoices and reports in Latitude.
9.2.3 Enter your company numbers including the prefixes for the company numbers.
If you are an Australian company, enter your ACN into Company Number including the prefix "A.C.N."
eg. "A.C.N. 009 123 456", and enter your ABN into the Other Number field including the prefix "ABN". If you are a non Australian company, enter your company number(s) in these fields including the prefixes (eg. "DUNS" 012345).
"ABN" 009 123 45678
9.2.4 Enter your Company Office and Postal Address. These addresses will appear in quotations, packet sheets, invoices, statements and some reports. To enter more than one line of address, use Ctrl-Enter to create a new line.
9.2.5 Enter Phone, Fax, Email and Website of your company. You may leave blank the ones you do not have. This information will be used in some invoices and reports.
9.2.6 Bitmap1, Bitmap2 and Letterhead Bitmap
Paste your logo(s) into the two boxes labelled as Bitmap1 and Bitmap2. Bitmap1 is used in the letterhead on invoices while Bitmap2 is used on some invoices and reports. Many companies use Bitmap1 to hold their company logo and Bitmap2 for the logo of the professional or industry association they belong to. Bitmap1 can also be used as a logo to most of the reports, just tick "Use as Report Header logo where possible"
The Letterhead Bitmap is used on Invoices.
9.2.7 Image Files Types and Requirement
Image files can either be on JPEG/JPG or BMP format. It is recommended to keep and use images with a file size of 100KB or less. Using images with a bigger file size affects application performance.
To create an image for your logo and letterhead, you can use Microsoft Paint or other graphic software to create a digitized file. Ensure your image meets the following requirements:
Letterhead Bitmap – 10 cm (Width) x 2.501cm (Height) or approximately 4 inches x 1 inch
Bitmap 1 and 2 – 1.735 cm (Width) x 1.524 cm (Height)
9.2.8 How to Paste Image Files into Logo or Letterhead
If the image format is BMP:
This is the easiest of the two image file formats but could also be the biggest in filesize so ensure it is within the 100KB file size.
Open the image file then copy and Paste or just drag & drop the file into Bitmap1, Bitmap2 or Letterhead Bitmap.
If the image format is JPEG/JPG:
JPEG/JPG is smaller in size
Copy (CTRL+C) and Paste (CTRL+V) or using the mouse will not work
Drag and Drop for this file type does not work as it will display the filename
To add a new image follow the procedure below for your Operating System-
For Windows 7
Right click on either Bitmap1, Bitmap2 or Letterhead Bitmap and select 'Insert Object'
Tick 'Create New' -> select 'Bitmap Image' then click OK
It opens Windows Paint -> drop down arrow for 'Paste' and select 'Paste From'
Select your JPEG/JPG file and click 'Open' button
From the Windows Paint Ribbon select the dropdown arrow (top left beside Home) and select 'Update Document'
Click the dropdown arrow again and select 'Exit and return to document'
For Windows XP
Right-click on either Bitmap1, Bitmap2 or Letterhead Bitmap and select 'Insert Object'
Select Create New -> select Bitmap Image -> click OK
Press ESC key
Right-click and select Bitmap Image Object -> select Open to display Windows Paint
Click Edit -> Paste From -> select your JPEG/JPG file -> click Open
Click File -> Update Setup Latitude & wait until your mouse cursor turns from cross to arrow
Click File -> select Exit & Return to Setup Latitude
)