|
2.2 Users are familiar with the Database interface |
  
|
|
2.2 Users are familiar with the Database interface |
|
2.2.1 Navigation buttons and record count are displayed at the bottom left of most screens: (from left to right)

Go to First Record
Move to the Previous Record
Record number/position of the current record in the table view
Move to the Next Record
Go to the Last Record
Add New Record
Count of number of records in the current table view.
2.2.2 How to move between records:
Latitude screens are opened in Edit mode (unless the "Load main forms in data entry mode" option is selected in the Setup Latitude screen). This means that when a screen is opened, the first existing record is shown. You can move to any existing record after a screen is open and then edit the record.
Move between records using buttons with 'left' and 'right' triangles located at the bottom left of each screen. The record number in the white box between these buttons indicates where you are in the range of records ( "1 of 200" indicates you are at the first record of 200 existing records).
Records can be searched for by looking for information in a specific field. To search for a record click on the field you wish to search by, and press Ctrl+F on your keyboard. This opens the standard Windows dialog box for searches.
Please note that in Latitude, you can also move between records using drop down lists in the Business Contacts and Job Information screens, and by using the Filter Options (where available). These methods are explained elsewhere in this guide.
2.2.3 How to add a new record:
In order to add a new record on a screen, click the New Record button with a black triangle and asterisk, at the bottom of the screen.
Note, there are other ways to add new records on some screens in Latitude, such as raising an Invoice from the Job Information screen by pressing the "New Inv" button and pressing the "New Document" button in the Register (Plans Files Documents) screen. These are discussed elsewhere in this guide.
2.2.4 Rich Text Features
Improve the appearance of Quotes and Invoices by applying Rich Text Formatting to task descriptions and QNote fields
Rich text formatting allows you to control the font, size, and color of the text and background. You may also apply Bold, Italicized or Underlining to the text as well as change the justification of the text between Left, Center, or Right Justify text
To format text, simply highlight/select the text and wait for a few seconds for the font formatting dialog to appear. You can also click the Record command tab and find the font group commands in the ribbon bar.
2.2.5 Zoom and Edit Screen
Click a text or memo field and press Shift+F2 to open the "Zoom" pop-up box to show all contents of a field or enter more text.
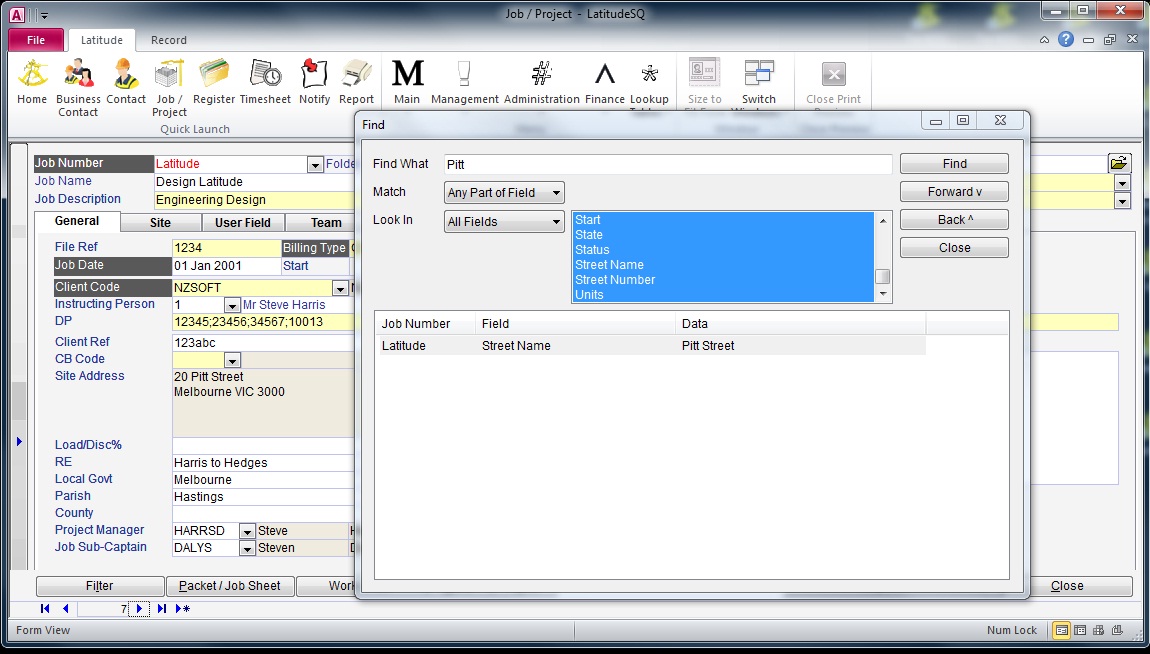
2.2.6 Finding Records

Find records quickly using the new Ctrl+F, options on the search dialog box are as follows:
Type the search criteria that you are looking for
Select a match option or leave the default
Any Part of Field - search for records containing any of the keywords you enter
Whole Field - search for records containing the exact keyword you enter
Select a Look In Option or leave the default
Current Field - Looks for your selected information only in the current selected field.
Current Document - Looks for your information in all fields of the current document.
Click "Find Next" or hit enter to view the results, this dialog box will go to the first available record that contains the information you specified.
Continuing to click "Find Next" will cycle through each available occurance of this information within the set of records.

)
)